How To Clean Purge Solenoid Valve
The purge solenoid valve is an integral part of the evaporative emission control system in vehicles, and hence plays an essential role in its operation. This unit is responsible for providing a control over the flow rate of fuel vapor from the charcoal canister to the intake manifold of the engine. As time goes on, the purge solenoid valve can accumulate dirt, debris, and carbon deposits, which will lead to potential malfunctions and result in poor engine performance. A regular cleaning of the purge solenoid valve is imperative if you wish to ensure that your vehicle is performing at its optimal level. This guide, which will show you in step-by-step detail how to clean a purge solenoid valve, will provide you with a detailed step-by-step procedure on how to ensure that a purge solenoid valve operates correctly and prevents any potential problems in the future.
Cleaning Your Purge Solenoid Valve Without Opening It
- Preparation:
- It is very important that you turn off and cool the engine before starting.
- To protect your eyes and hands, make sure that you put on safety goggles and nitrile gloves.
- Locate the Purge Solenoid Valve:
- It is typically located near the charcoal canister or in the engine compartment that the purge solenoid valve is located. To locate the location of the ignition switch, you should refer to your vehicle’s manual or consult an online resource.
- Disconnect Electrical Connections:
- You should disconnect the electrical connectors that are attached to the purge solenoid valve very carefully. You need to gently release the clips or tabs that secure these connectors, and they are usually secured by clips or tabs. Remember their positions in order to reinstall them at a later time.
- Inspect the Valve:
- There should be no visible evidence of dirt, debris, or corrosion visible on the purge solenoid valve. In order to determine where the fuel vapor is flowing through the valve, you need to pay attention to the openings and passages.
- Clean the Exterior:
- Wipe the exterior of the purge solenoid valve with a clean lint-free cloth or paper towel in order to remove all dirt and debris. The dirt and debris should be gently removed from the brush. To avoid damaging the valve, you should avoid using excessive force when opening and closing it.
- Use Electrical Contact Cleaner:
- Clean the purge solenoid valve with an electric contact cleaner that is specifically designed for delicate electronics. If there is any dirt or debris stuck in the openings or passageways, focus on removing it.
- Allow Drying Time:
- Allow the electrical contact cleaner to evaporate for a short period of time and then allow it to dry. It is important to clean the purge solenoid valve thoroughly before reinstallation in order to ensure that no residue remains on it.
- Reconnect Electrical Connections:
- Attach the electrical connectors to the purge solenoid valve in their respective positions. It is important to ensure a proper and secure connection between the two devices.
- Test and Verify:
- The engine should be started and the performance of the engine observed. It is recommended to ensure there are no abnormal engine behaviors or warning lights that indicate a further issue with the purge solenoid valve before proceeding.
When the purge solenoid valve is cleaned without opening it, external contaminants and contaminants inside the solenoid can be removed, which will improve the performance of the valve. As a result, if the valve continues to malfunction or shows signs of significant dirt and debris buildup, it may require more thorough cleaning, or it may even need to be replaced if it continues to malfunction or shows signs of dirt and debris buildup. The best method of resolving issues is to consult with a qualified mechanic if you have any doubts or encounter persistent problems with your car.
Opening and deep cleaning your purge solenoid valve
- Preparation:
-
It is very important that you turn off and cool the engine before starting.
-
Protect your eyes and hands by wearing safety goggles and nitrile gloves while working.
-
- Locate the Purge Solenoid Valve:
- The purge solenoid valve can be located by consulting your vehicle’s service manual or by referring to online resources. A charcoal canister or the engine compartment are usually the places where you can find this gasket.
- Disconnect Electrical Connections:
- Make sure the electrical connectors attached to the purge solenoid valve are disconnected with care. There are usually clips or tabs attached to these connectors that need to be gently released in order to ensure that they are secure. In order to reinstall them later on, you will need to take note of their positions.
- Remove the Purge Solenoid Valve:
- In order to protect the purge solenoid valve from damage, bolts, screws, or retaining clips may be used to secure it depending on the specific design. If any of these fasteners need to be removed, use the appropriate tools to remove them and carefully detach the valve from where it is mounted.
- Inspect the Valve:
- There should be no dirt, debris, or carbon buildup anywhere inside the solenoid valve that would indicate that it has been cleaned. Keep a close eye on the openings and passages on the valve where the fuel vapor flowed through.
- Disassemble the Valve:
- You may be able to disassemble some purge solenoid valves in order to thoroughly clean them. Follow the instructions provided by the manufacturer or look for visible tabs, screws, or clips that allow you to separate the valve’s individual components after you have followed the instructions. It is important to remember how the parts should be arranged and oriented when reassembly takes place.
- Clean the Components:
- It is important to soak the parts, which have been disassembled, in a cleaning solution that is appropriate for the parts, such as carburetor cleaner or throttle body cleaner. Put the computers in the cleaning solution and use a soft brush to scrub away the dirt and debris, as well as the carbon build-up, by immersing them in the solution. Keep an eye out for the valve’s passages and openings and pay close attention to them.
- Rinse and Dry:
- Following the scrubbing process, rinse the components with clean water to ensure that all residual cleaning solution as well as any loosen debris has been removed. Be sure to thoroughly dry each part before reassembling the machine. Compressed air can be used to dry them or you can let them dry naturally by allowing them to air dry.
- Reassemble the Valve:
- To reassemble the purge solenoid valve, follow the reverse order of disassembling it in order to reassemble it. Make sure that all components of the assembly are aligned properly and are securely fastened. During disassembly, remember to refer to the notes you made or the photographs you took as needed.
- Reconnect Electrical Connections:
- On the purge solenoid valve, the electrical connectors should be reconnected to their respective positions. The connection should be made securely and in a proper manner.
- Reinstall the Purge Solenoid Valve:
- The purge solenoid valve needs to be reinstalled carefully back into the mounting location that it was originally mounted in. For the purpose of securing it in place, you will need to use the appropriate fasteners.
- Test and Verify:
- The engine should be started and the performance of the engine observed. It is recommended to ensure there are no abnormal engine behaviors or warning lights that indicate a further issue with the purge solenoid valve before proceeding.
When disassembly of the purge solenoid valve is conducted, it is possible for the internal contaminants of the solenoid valve to be thoroughly removed. There is, however, one thing you should keep in mind during this process: it is vital that the valve components are handled with precision and care during this process. It is recommended that you seek the assistance of a qualified mechanic if you are unsure or don’t feel confident about disassembling the valve yourself in order to ensure that the valve is properly cleaned or may need to be replaced.
How Does a Purge Valve Solenoid Work
In order for the vehicle to effectively control evaporative emissions, the purge solenoid valve plays a crucial role in the process. For the purpose of burning fuel as quickly as possible, this valve is responsible for regulating the flow of fuel vapor from the charcoal canister to the engine so that it may be burned as efficiently as possible. The purpose of a purge solenoid valve can be better understood if we take a close look at what it does in order to understand how it works:
- Purpose of the Purge Solenoid Valve:
- In order to reduce the amount of emissions from the fuel tank, we designed an evaporative emissions control system which captures and stores fuel vapor. In order to store these vapors, the charcoal canister performs the function of a storage container. There is however a requirement to efficiently reintroduce these captured vapors into the engine so they can be burned instead of being released into the atmosphere once they have been captured. The purge solenoid valve is what plays a key role in this process.
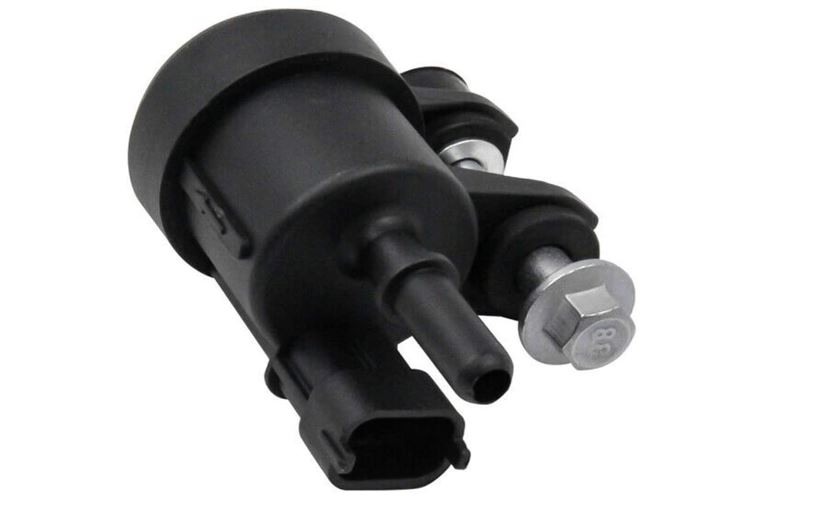
- Components of the Purge Solenoid Valve:
- Purge solenoid valves are composed of a number of key components, including the following:
- Solenoid: A coil of wire is composed of a plunger and is connected to an electromechanical device that contains a coil of wire. A magnetic field is created when the coil is energized, forcing the plunger to move back and forth as a result of the magnetic field.
- Diaphragm: A solenoid is attached to a diaphragm that acts as a valve and connects directly to the solenoid. As a result of the solenoid being activated, the diaphragm moves, opening and closing the passage for fuel vapor flow according to the position of the solenoid.
- Vent: It is also possible to maintain a proper pressure balance in a purge system by connecting the purge solenoid valve to a vent or atmospheric connection.
- Purge solenoid valves are composed of a number of key components, including the following:
- Operating Principle:
- In order to operate the purge solenoid valve, the engine control unit (ECU) or the powertrain control module (PCM) sends the solenoid valve commands based on the information it receives from those devices. As a result, the ECU monitors a variety of parameters such as engine load, engine temperature, and operation conditions of the vehicle to determine the appropriate time to purge the stored fuel vapor from the engine.
- Purge Cycle:
-
In operation, the purge solenoid valve is closed, which prevents combustion of fuel vapor within the engine as long as the purge solenoid valve remains closed. As a result, fuel vapor is contained inside the charcoal canister rather than being released into the atmosphere.
-
It is the ECU that determines when the conditions are suitable for purging, and it sends a signal energizing the purge solenoid valve in the event that the ECU decides the conditions are suitable for purging.
-
When the solenoid is energized, the diaphragm will be lifted and the passage between the charcoal canister and the intake manifold will be opened. In this way, the fuel vapor can be injected into the engine and flow into the combustion chamber.
-
During the normal operation of the engine, the fuel vapor mixes with the air incoming into the intake manifold and is combusted as it enters the combustion chamber.
-
In order to stop fuel vapors from flowing from the engine, the ECU de-energizes the solenoid once the purge cycle has been completed or when certain conditions are met.
-
- System Integrity Check:
- ECUs are also programmed to perform periodic checks of the integrity of the system to ensure that the purge solenoid valve as well as the evaporative emissions control system are properly functioning. The system relies on a range of sensors and tests to detect any leaks, malfunctions, or abnormalities in the system that might be present.
Purge solenoid valves help maintain the proper balance of fuel and air mixtures in the engine by regulating the flow of fuel vapor through them, allowing the engine to burn more efficiently and less exhaust emissions. In addition to ensuring compliance with environmental regulations, it also promotes fuel efficiency and ensures that the vehicle meets emissions standards.
how to bypass purge valve
can you bypass evap purge valve
how to reset purge valve
how to remove purge valve
do you need a purge valve
how does a purge valve work
how hard is it to change a purge valve
purge valve stuck closed symptoms
how to disable evap system
how to clean purge solenoid valve
can you bypass evap purge valve
how to bypass purge valve ford
evap delete pros and cons
how to bypass purge valve chevy
purge valve delete