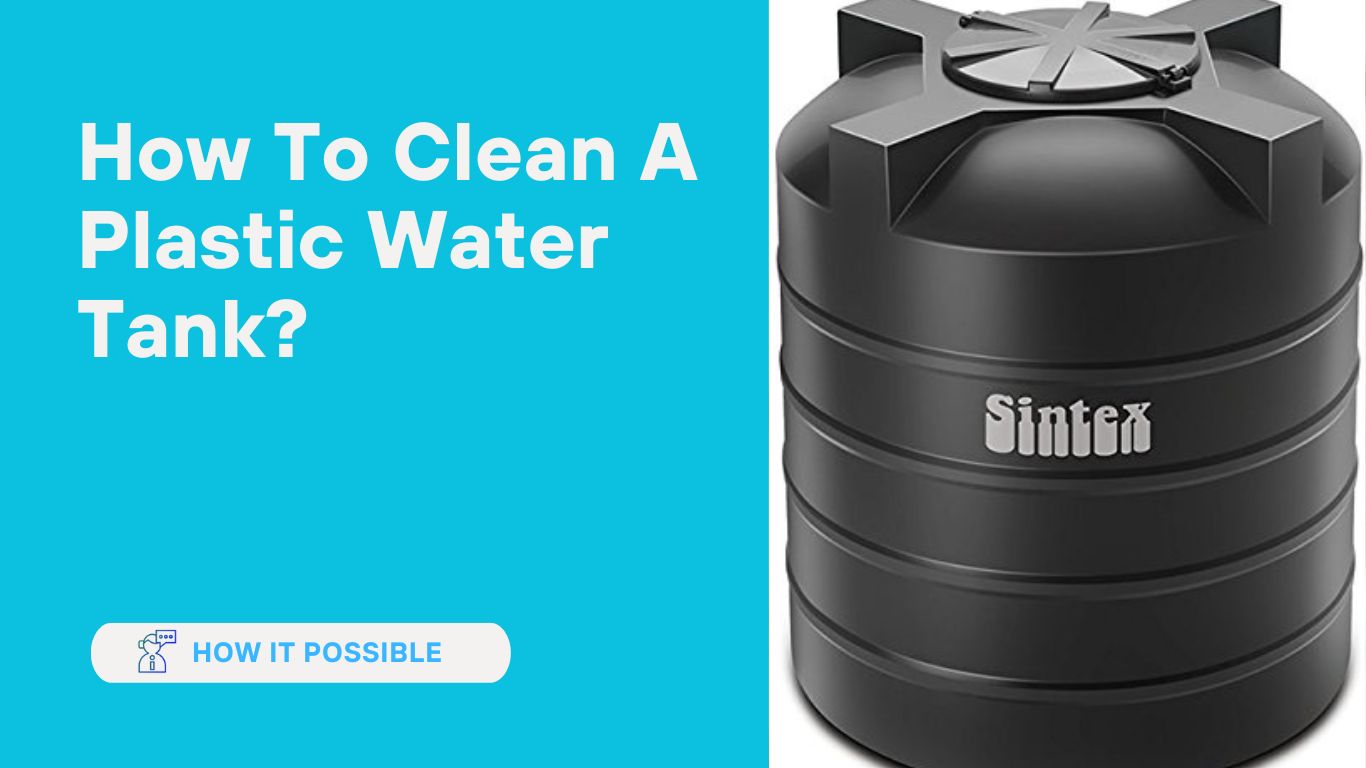
How To Clean A Plastic Water Tank?
When it is your primary supply of drinking water, having to clean a plastic water tank may be a challenging and time-consuming operation. It is recommended that the water tank be cleaned at least twice a year. Because it starts to grow algae, bacteria, and fungus within the tank as soon as it comes into touch with sunlight and moisture if it isn’t properly maintained.
Having access to clean water at home in a storage tank is critical to sustaining one’s health. Keeping the water that we drink in containers like tanks is one approach to guarantee that it does not contain any potentially dangerous pollutants.
Nevertheless, as time passes, these tanks are prone to becoming filthy and infected with germs, algae, and other potentially hazardous things. Therefore, it is essential to clean the water tank on a regular basis and maintain it so that the water may continue to be used safely and without risk to one’s health.
What is a Plastic Tank?
A plastic tank is a storage device that has the ability to be vertical, horizontal, below or above ground, fixed in situ or moveable, and has a big capacity for either liquid or granular materials. They are constructed to withstand wear and tear, weathering, and degradation for extended periods of time while simultaneously holding many gallons of a variety of chemicals. Plastic tanks are essential for the transport and storage of resources for later use for many industries, including manufacturing, agriculture, and the fuel industry.
In comparison to steel, stainless steel, and lined tanks, the lifespan of plastic tanks is far longer, and their cost is significantly lower. They have a relatively low installation cost and may last anywhere from 20 to 30 years if they are placed properly. Proper installation, the kinds of chemicals that are housed within, venting, and the kinds of pipe fittings that are used all contribute to the lifetime of a plastic tank.
Step-By-Step Guide : How To Clean A Plastic Water Tank
1. Drain The Whole Water
To begin, you will need to completely empty the tank. Put water away in containers or any other convenient location so that you may utilize it at a later time. At the very bottom of the tank, there will be more water than at any other point. Use a pail to remove all of the water, and then mop up any remaining moisture with a dry towel or cloth. Utilize a vacuum to remove all of the water from the tank if the tank is on the smaller side.
2. Now Clean Inside Of The Tank
Take several cups’ worth of detergent powder and combine it with either hot water or regular water. A solution of water and detergent powder should be made, and then that solution should be poured into each part. Scrub with a bristle brush in addition to a rough scrub pad.
Acid can be used if your tank has iron stains that are particularly thick. It will be helpful in removing any and all stains. After the acid has been spread over the entirety of the tank, the lid should be replaced for a period of ten minutes. After 10 minutes, remove the lid, and using the same method, clean the inside of the container. Following the acid wash comes the detergent wash, which must be completed.
Scrub the tank thoroughly, being sure to get into every nook and cranny, using your hands in both horizontal and vertical motions.
3. Rinse The Tank
When you are certain that the tank has been scrubbed to perfection, it is time to rinse it off. The most effective method for cleaning the inside walls is to use a hosepipe. Be careful to scrub every nook and cranny of the tank, and check to see that there is no detergent left in it. After the last rinse, make sure all of the water is drained.
4. Disinfect The Tank
In order to sterilize the container, mix together chlorine bleach and clean water in the appropriate proportions (for a tank holding 500 liters, use two cups of bleach). Replace the cover and let it sit for a full day. After twenty-four hours, remove the cap and use a chlorine strip to get a reading of the chlorine concentration in the water. Repeat the steps from the previous step if there is still chlorine present in the water after dipping the strip in it.
Now empty all of the water from the container. Your tank is now ready to be used once more!
How Plastic Tanks are Made
The most popular types of raw material used in the production of plastic tanks are polyethylene and polypropylene. The production process for plastic tanks can take many different forms. Injection molding, blow molding, or rotational molding are the three most popular ways used to manufacture plastic tanks. Variations on these three technologies are used to manufacture different types of plastic components and parts.
Rotational Molding
Rotational molding, also known as roto molding, is a technique that equally distributes the polymer material by combining low pressure and high temperature with a mold that is rotated along numerous axes. A huge steel shell with the exact dimensions of the finished tank serves as the mold for plastic storage tanks.
Loading
The process of rotational molding begins with loading the powdered form of the polymer material into the mold. This is the first stage. The volume of the tank as well as the thickness of its walls determine the quantity of powder that should be used. Because most plastic tanks are white, green, grey, or black, color does not play a significant role in the selection process for plastic tanks. The kind of material that will be stored in the tanks is an important consideration that has to be made with relation to the color of the tanks.
Tank Oven
The powder and the mold are put into an oven, where the heat gradually melts the powder over the course of several rotations of the mold while it is in the oven. The molten powder covers the surface of the multiaxial mold as it rotates in order to create the mold. The rotating speed and angle are both controlled by a computer program so that the necessary wall thickness may be achieved. The duration of the procedure is around one to three hours, however it might vary greatly depending on the size of the tank.
Cooling
As the heat is gradually withdrawn, the mold is permitted to continue rotating while it is allowed to cool down. The molten plastic polymer begins to solidify against the walls of the tank as the mold continues to cool down. The time needed for this stage of the procedure is around one hour.
Blow Molding
Through the process of blow molding, a molten thermoplastic tube, known as a parison, is inflated or blown into the two halves of a mold cavity to create a plastic tank. Even though there are many different ways to perform blow molding, the process always begins with melting the plastic resin, followed by shaping the plastic, and then combining it with compressed air. The processes of extrusion, injection, and stretch make up the many varieties of blow molding.
Molded Tank Removal
The process for removing the tank is determined by the size of the tank to be removed. The removal of smaller tanks may be done manually, however the removal of bigger tanks requires a forklift or crane. Because improper handling might result in damage to the tank, this step of the operation is quite important. It is carried out in a sluggish and watchful manner, with the utmost attention to detail.
In comparison to injection molding, rotational molding is more cost-effective and provides seamless, leak-proof tanks that are made from a single piece. In order to install pipes and fittings, holes or access ports are cut into the tank. These holes are in the tank itself.
Melting
When using the extrusion method, the plastic resin is first loaded into a hopper and then advanced toward the blow pin by a device like a corkscrew. This mechanism warms the resin as it advances it toward the blow pin. After the plastic material has been extruded, it goes through a process in which it is transformed into a parison.
Blowing
The heated parison is poured into the mold, where it will be injected by compressed air. Once this process is complete, the heated parison will take the shape of the mold due to the pressure exerted by the compressed air as it is forced to adhere to the sides of the mold.
As shown in the picture that follows, the injection procedure does not require the use of the corkscrew device; rather, it forms the parison in an injection mold, from which it is transferred to the blow mold. This technique is known as “direct injection.” Once the parison has been placed in the blow mold, a procedure that is very similar to the extrusion method is used to force compressed air into it so that it may adapt to the shape of the mold.
The fabrication of plastic tanks does not often include the use of the stretch blow molding technique, and this method does not need the utilization of a parison. During this step of the process, a preform is first heated, and then compressed air is used to stretch the preform into the shape of the mold.
Plastic Welding
Welding plastics requires three processes, which are fairly comparable to the procedures involved in welding metals. Plastic is more malleable than other materials, so it can be readily welded, and it can also establish a solid connection that is airtight. This makes welding plastic more simpler than welding other materials. The surface must be prepared before the plastic welding process can begin, then heat and pressure must be applied, and finally, the plastic must be allowed to cool.
There are a few distinct methods of plastic welding, each of which makes use of a unique kind of heat. Plastic welding is a handy and cost-effective method for maintaining the functionality and condition of plastic storage tanks. When welding plastics, one of the principles is that you may only weld materials that are similar to one other. When it comes to deciding whether or not to weld, it is essential to determine the type of plastic involved.
After the surface has been prepared, the procedure continues with the creation of a “V” groove that runs parallel to the weld line. Following the cutting of the “V” groove, the tacking can be finished in whichever location the welding rod will be inserted. After these procedures have been finished, it will be possible to start welding.
Even though there are other ways to join plastics, such as by using adhesives or fasteners, the sort of bond that can be created with plastic welding is not the same as the bond that can be created with the other techniques. The primary advantage of plastic welding is the creation of a tighter and more secure seal that is also more robust and will persist for a longer period of time. After the procedure is finished, the resulting seal is undetectable and blends in perfectly with the substance that was there before.
5 Easy Steps To Clean Water Tanks At Home:
In this lesson, you will learn why having a clean water tank at home is so important, as well as five simple measures you can take to get there.
You can assist guarantee that you have a clean water tank that is free from dangerous toxins and is safe to drink by following the instructions in this guide.
Therefore, let’s get right in and start learning how to maintain a clean and healthy environment for our water tanks.
Step 1: The Process Of Emptying The Tank
The first thing you should do to guarantee a thorough cleaning is to empty out the water tank. It is essential to complete this procedure in order to guarantee that all of the trash and impurities in the tank have been eliminated. Here are some of the reasons why it’s vital to empty the tank:
Why It’S Important To Empty The Tank:
- After emptying the tank of its water, you will have a clear view of the interior and will be able to locate any impurities that are apparent.
- After completing this process, any sediments or debris that have accumulated to the bottom of the tank will be removed.
- It is imperative that the tank be emptied entirely before beginning the cleaning procedure so that it may be effective and comprehensive.
Emptying instructions:
Make sure that the water supply to the tank is turned off and that there is no water going into the tank.
Turn the valve at the base of the tank counterclockwise to release the water that is trapped inside.
To speed up the process of draining the tank, a high-pressure hose should be used.
Make sure the pipes that lead to the outlets are clear of debris and clean by inspecting them.
Tank Emptying Safety Precautions:
- During the process of emptying the tank, you need to make sure that there are no electrical connections in the area.
- Put on some rubber gloves to protect yourself from any possible water pollution.
- Because the surface might be slick, you need to be very careful not to fall when you are emptying the tank.
- In order to prevent contamination, make sure that the water is drained away from the home and any other sources of water.
Before going on to the next stage of cleaning your water tank, ensure that you have followed all of these guidelines and safety measures to do so in order to do it successfully and without incident.
Step 2: Scrubbing the tank
The cleaning procedure begins with the scrubbing of the tank, which is a vital phase. It is vital to complete this step in order to clean the walls and bottom of the tank of any dirt, debris, or algae that may have gathered there. The following are some of the reasons why cleaning the tank is essential:
The Need To Scrub The Tank:
- Scrubbing the tank helps remove any impurities that may be apparent and is helpful in removing any that may be present.
- Following this phase, the surface of the tank will be meticulously cleaned and will be clear of any debris or filth that may have accumulated at the bottom of the container.
- Scrubbing the tank helps eliminate any bacteria or algae that may be forming on the walls of the tank as well, so make sure to do that before you start.
Tank scrub instructions:
- The walls and the bottom of the tank should be scrubbed thoroughly using a brush with strong bristles.
- Pay particular attention to the nooks and crannies as well as the spots that are difficult to access.
- In the event that it is essential, climb up a ladder to reach the top of the tank.
- Be careful to clean the tank thoroughly by removing any dirt, debris, or algae that may be seen.
Scrub The Tank With These Tools:
- Scrub the inside of the tank’s walls and bottom with a brush that has a long handle and bristles that are very dense.
- You may also use a high-pressure washer to assist in the removal of any dirt or debris that is particularly tenacious.
- While you are scrubbing the tank, ensure that you are protecting yourself by wearing rubber gloves and protective gear.
You will be able to successfully scrub your water tank and eliminate any pollutants that may be there if you adhere to these guidelines and make use of the instruments that are advised.
Step 3: Rinsing The Tank
After giving the tank a good washing, the next thing to do is to give it a good rinsing to get rid of any leftover debris or filth. It is necessary to do this procedure in order to guarantee that the tank is clean and devoid of any impurities. The following is the procedure for rinsing the tank:
Rinse The Tank Thoroughly With A High-Pressure Hose:
- After connecting a hose with a high pressure to the source of the water, use the hose to completely clean the inside of the tank, including the walls and the bottom.
- To guarantee that all dirt and debris are removed from the tank, make sure that the hose is directed toward the tank’s corners and other locations that are difficult to access.
- In the event that it is essential, climb up a ladder to reach the top of the tank.
- Rinse the tank thoroughly until you are ensured that all debris and grime have been removed.
Remove All Debris And Dirt From The Tank:
- After you have finished washing the tank, you should check it to make sure that all of the debris and dirt have been removed.
- Make sure that the pipes that lead to the outlets are clean and that there are no obstructions in them.
- If required, restart the rinse procedure until the tank reaches an entirely pristine state of cleanliness.
You will be able to effectively rinse your water tank and eliminate any leftover filth or debris if you pay attention to these instructions and make use of a hose with a high pressure setting. This procedure is essential in order to guarantee that your water tank is spotless and devoid of any harmful substances.
Step 4: Treating The Water
It is imperative that the water in the tank be treated in order to guarantee that the water is fit for consumption and devoid of any harmful substances. The following are some of the reasons why water treatment is required:
Why Water Needs To Be Treated:
- Even after thoroughly cleaning and washing the container, the water within may still contain bacteria or other potentially hazardous substances.
- The water is made clean and safe to drink after it has been treated, which eliminates any bacteria or other potentially hazardous impurities that may still be present.
Methods Of Water Treatment:
- Chlorination:In the process of sanitizing water, chlorine is frequently utilized. For the purpose of eradicating bacteria and any other potentially hazardous impurities, it is first introduced into the water in a certain amount and then let to stand for a predetermined amount of time.
- Ultraviolet (UV) Treatment:Bacteria and other potentially hazardous impurities in the water can be eliminated with the use of UV light. The water is purified by going through a UV chamber, which exposes it to UV radiation, which destroys any bacteria and other potentially hazardous impurities that may be present.
- Ozonation:In order to sterilize the water, ozone gas is utilized. When the gas is bubbled through the water, it eliminates all bacteria as well as any other potentially hazardous impurities.
Water Treatment Instructions:
Pick the approach of water purification that best meets your requirements.
- The water should be treated with the necessary quantity of the treatment chemicals or equipment in accordance with the instructions.
- Please wait the allotted period of time before attempting to use the therapy.
- After the allotted time for the treatment, the water should be tested to confirm that any bacteria and other potentially hazardous impurities have been eliminated.
You may guarantee that the water in your tank is clean and free from harmful substances by carefully following these guidelines and utilizing the technique of water treatment that is most suited for your situation.
Step 5: Refilling The Tank
The third phase, which takes place after the water has been treated, is to replenish the tank. This is how you put more gas in the tank:
Refilling The Tank:
- Put a stopper in the valve that leads to the output pipe.
- To add water to the tank, you may either use a hose or a bucket.
- When the tank is completely full, the valve that controls the output pipe can be opened.
When Refilling The Tank, Follow These Precautions:
- Make sure that all of the preceding stages, such as cleaning, washing, and treating the water, have been finished before you attempt to refill the tank. This includes the tank itself.
- Make sure that the water source that is utilized to replenish the tank is clean and fit for human consumption before beginning the process.
- It is important to prevent the water from spilling over and creating a mess by not filling the tank to its maximum capacity.
After A Clean Water Tank, Check The Water Quality:
- After the storage container has been refilled, do an analysis of the water to see whether it contains bacteria or any other potentially hazardous impurities.
- Either by utilizing a water testing kit or by sending a sample to a laboratory that specializes in water testing, you may determine the quality of the water.
- It is suggested to conduct water quality tests on a regular basis to verify that the water continues to be risk-free and uncontaminated.
You will be able to replenish your water tank with clean and safe water if you pay attention to these instructions and take the appropriate safety measures. Keep in mind that the water’s quality should be checked on a regular basis to guarantee that it will continue to be suitable for consumption.
How to Care for a Plastic Tank
Plastic tanks, like any other kind of instrument, need to be maintained properly in order to be effective. Plastic tanks are extremely durable and long-lasting, but if they are not examined and maintained, their condition might degrade over time. This is especially important to keep in mind for any tanks that are operating in potentially dangerous conditions. Tanks that are intended to hold compounds that are volatile or explosive require more care and attention in order to safeguard both people and the environment.
Temperature
Because heat may hasten the aging process and damage equipment, exposure to high temperatures is one of the most significant threats that can be posed to sensitive machinery. When it comes to plastic storage tanks, exposing one to high temperatures for an extended period of time can significantly reduce the tank’s functional lifespan. The content of the tank, its size and configuration, how it was created, the thickness of its walls, and the sort of supports it may have all play a role in determining how the temperature will affect the tank.
It is obviously more difficult to determine the impacts of heat on subterranean tanks, despite the fact that the vast majority of buried tanks have enough insulation and are specifically constructed for their role and climate.
Ultraviolet Light
When thermoplastics have not been treated with a UV protection coating, they absorb the rays of light, which causes discolouration and renders them brittle. This may be avoided by treating the thermoplastics with the coating. The thermoplastic will eventually break if the exposure is allowed to continue. When there are situations present in which the temperature is raised, the cracking goes much more quickly. When a plastic tank is being manufactured, one of the characteristics that is taken into consideration by the makers is the sorts of severe circumstances and weathering that the tank may be subjected to. They take extraordinary measures to guarantee that their tanks are up to the task of satisfying the requirements of the applications.
Cracking
Regardless of the nature, any and all polyethylene materials are susceptible to cracking in some form or another. This holds especially true in the event that they are subjected to particular detergents. Certain variations of plastic are resistant to the effects of stress, which causes many types of plastic to break. Surface agents like fillings, bands, and tie downs can induce stress cracking to occur in a material. Any potential damage caused by cracking may be avoided by following a series of preventative measures and exercising caution.
Support
The positioning of a plastic tank is one of the first things to think about when it comes to maintaining its health and upkeep. It is possible for them to get stressed and crack if they are placed in areas that have a large volume of foot traffic or on uneven ground. It is imperative that plastic tanks be inspected to see whether or not they have enough support, regardless of whether or not they are being used for transit or storage in situ. During the loading and unloading procedures, extra caution should be exercised to ensure that the tank does not go out of balance and is instead centered. If the bottom of the tank is positioned correctly, it is possible to avoid causing any harm or damage.
Environment
Determining the impacts of the environment in which a plastic tank will be installed is a challenging step in the installation process. The inability to foresee any kind of problems in the process’s future presents a challenge for this particular facet of it. Plastic tanks have to be positioned in such a way that they are not at risk of being damaged by debris that is falling from above. Because of this, it is necessary to take into account the location of natural impediments such as trees and overhangs. The tank may be constructed to withstand any variations in temperature as well as any precipitation that may fall during extreme weather conditions. It may not be able to survive items falling on it like trees or rocks, though, since this may damage it beyond repair.
Tank Specifications
There are variations in the quality of each individual plastic tank. Although there are some tanks that are general and may be modified to work in a range of environments, the majority of tanks are developed for one specific use. It is vital to examine the manufacturer’s specifications and constraints prior to purchasing, using, and installing a tank since certain tanks have temperature and environmental requirements. This is because some tanks are designed to store liquids. The vast majority of the time, special purpose tanks have been produced specifically for their role, and then those tanks have been acquired specifically for that duty. Being aware of the constraints placed on the tank can assist in extending its useful life.
Cleaning
Maintaining a tank’s cleanliness is essential to maximizing the utility that may be derived from it. Given that a tank is a tool that is intended for labor that is strenuous, this may appear to be an irrelevant point of concern. When it comes to the longevity of any tool, proper maintenance is absolutely essential. Tank cleaning is a scheduled and frequent need that is added to the workweek in a number of different sectors, including the food and chemical industries. This may not be the case with tanks that are used for other reasons, and it is important to give this a lot of thought.
Reverse Osmosis Filter Systems
The plastic tanks that are used in the process of reverse osmosis have been custom-built to resist the tremendous pressure that is generated during the process. The primary reason that tanks used in reverse osmosis should be maintained on a consistent basis and properly inspected at regular intervals is the pressure that is present in the system. Even though most plastics are able to withstand high pressure circumstances, it is always good practice to inspect the state of the tank for cracks, weak places, or degradation. Even though most plastics are capable of withstanding high pressure situations.
Pipe Connections
When it comes to extending the life of a polyethylene tank, having its piping properly connected is one of the most significant things that can be done. Plastic tanks have walls that expand somewhat when filled with liquid, although this expansion is imperceptible to the human eye. This happens when the tank is full. The growth is significantly more pronounced in situations when warm liquids are being kept in storage.
In the event that a drain pipe or fill pipe is linked to a plastic tank, the pipe that connects the two must be flexible enough to accommodate the movement of the tank walls when the tank expands; otherwise, the pipe will get strained and fracture. Connecting the tank fitting to an expansion fitting or joint of some kind is the solution to this problem. This will enable the tank fitting to have some degree of flexibility of movement.
Connecting the plastic tank fittings directly to a threaded plastic hose barb adapter is the most effective way to compensate for the movement of the tank wall expanding and contracting. In addition, adding a flexible plastic tube that is approximately 12 to 18 inches in length using stainless steel band clamps is another important step in this process. It is important to note that although the light plastic valve should be connected between the tank fitting and the tube, it should not be anchored until the expansion fitting has been placed. If this is not done, the expansion fitting will not serve its intended purpose. It is also possible to make use of other kinds of fittings, such as expansion joints of the bellows type.
The durability and extended lifespan of a plastic tank are ensured by the expert installation of its piping system.
Indoor and Outdoor Installation
The difference in lifetime between plastic tanks is directly proportional to whether or not they are kept indoors or outside. If they are correctly piped and maintained at room temperature, indoor tanks are shielded from the damaging effects of the sun’s ultraviolet (UV) radiation. They have a potential lifespan of exceeding 30 years.
The lifespan of a plastic tank is reduced to 20 years when it is placed in the open air and subjected to UV radiation, particularly in hot areas. Plastic outdoor tanks can have their lifespan greatly increased by many years if they are painted, painted over, or covered with a tank jacket in addition to being protected by a roof or shelter. Tanks stored outside can have their lifespans extended by using jackets to prevent them from freezing.
How Plastic Storage Tanks are Used
The cost of storing a broad variety of goods in plastic tanks that are built from polyethylene and polypropylene has decreased in recent years, making this option more attractive. Before the invention of plastic tanks, the most prevalent way for storing liquids, grains, and granular materials was to use a variety of metal containers. Plastic tanks have now replaced metal containers as the most frequent approach. The breakthroughs that have been made in plastics have made it possible to produce storage systems that are more durable and robust than the conventional ones.
Plastic storage tanks were first put to use for the purpose of storing water for agricultural purposes, including the watering of crops and livestock. Plastic water tanks have been used for a variety of additional functions ever since polymers became more practically applicable.
Water Storage Plastic Tanks
Because they can be easily attached to downspouts and used as rainwater harvesters or as a way of collecting water for use in commercial and industrial settings, plastic tanks have become a popular means of storing water in recent years. They are necessary in rural regions because they assist replenish the meager water supply that is available. Because of its versatility, plastic tanks may be used to store a wide variety of water, including seawater, distilled water, waste water, ground water, precipitation, melting snow, and rainwater.
Chemical Storage Plastic Tanks
Plastic storage tanks are available in a wide variety of dimensions, gauges, strengths, and other parameters necessary for the secure storage of chemicals. They are able to withstand extreme weather conditions and can be installed in any area, which has contributed to their rise in popularity as a material of choice for usage in manufacturing and industrial settings. The use of polyethylene plastic tanks, which do not rust, corrode, or degrade due to wear like metal storage tanks do, has been gradually replacing the use of metal storage tanks as a safer technique for storing chemicals. They are able to store a wide variety of acids, including hydrochloric, sulfuric, sodium hypochlorite, and nitric acid, as well as medicinal goods, fertilizers, and insecticides. The sole safety measure that should be taken when storing acids is to pay attention to the kind of plastic that was used to construct the tank. An analysis of the plastic’s tensile and flexural strengths, as well as its resistance to damage, must be performed before it can be decided which kind of tank may be utilized.
Fuel Storage Plastic Tanks
Racetracks, industries, and service garages all employ plastic storage tanks since they have been discovered to be an ideal way for the storage of gasoline. Plastic storage tanks include a core made of polyethylene, which allows them to store virtually any form of fuel, from diesel and gasoline to butane and natural gas.
Grain Storage Plastic Tanks
Corn, soybeans, and other granular goods can be stored in grain feed bins while they are not in use. They are constructed of polyethylene that has been treated with ultraviolet light and can be up to 3/16 of an inch thick. The durability of plastic storage tanks to rust, corrosion, and weather is the primary rationale for its use while storing grains as opposed to metal storage containers, which have historically proved problematic. Plastic tanks have a smooth internal surface, which eliminates the need for rivets and decreases the likelihood of clogging seams and bridging.
Plastic Septic Tank
Plastic septic tanks have emerged as a viable choice for the collection of waste due to its superior durability to more conventional waste management practices, as well as their ease of installation and lower cost. Plastic septic tanks are often manufactured by the process of rotational molding, which ensures that the finished product will have a smooth, one-piece structure. Plastic septic tanks, in contrast to other types of septic tanks, do not require any kind of additional coating because the plastic material can endure any kind of environment.
One of the things that might go wrong with septic tanks is their reactivity to the gases or chemicals that are present in the surrounding soil. The polyethylene that is used in the production of plastic septic tanks is resistant to the chemicals in the soil as well as the gases that are produced by the sewage system.
Frequently Asked Questions – How To Clean A Plastic Water Tank
Q: How To Remove Algae From A Plastic Water Tank?
A: These are the actions you need to do in order to remove algae from a plastic water tank:
- Completely empty the tank of its contents.
- In the tank, combine water and bleach in a ratio of 1:10, or white vinegar in a ratio of 1:2, depending on your preference.
- Use a brush to clean the inside of the tank, both the walls and the bottom.
- Give the solution some time to rest before continuing.
- Rinse the tank completely with clean water until there is no trace of the scent of bleach or vinegar left.
- Put some fresh water in the tank and fill it up.
Q: How To Clean A Plastic Water Tank?
A: The following procedures are required for cleaning a plastic water tank:
- Completely empty the tank of its contents.
- The inner walls and bottom should be scrubbed with a gentle detergent and a brush.
- Make sure there is no trace of detergent remaining in the tank by giving it a thorough rinsing with clean water.
- You have the option of sanitizing the tank using a solution that consists of water and bleach in a ratio of 1:10, or with white vinegar in a ratio of 1:2.
- Rinse once again with clean water to eradicate any trace of the smell of the disinfectant.
- Fresh water has to be added to the tank.
Q: How To Repair A Plastic Water Tank?
A: Fixing a plastic water tank may require repairing cracks or leaks in the container. For quite little dripping or cracking:
- First, the tank has to be emptied, and then the area around the damage needs to be cleaned.
- To patch the area, you can either use an epoxy specifically developed for plastic or a plastic tank repair kit.
- Be sure to apply the product as directed and allow it the appropriate amount of time to dry.
- After the tank has been allowed to dry, you should refill it and check for leaks.
Q: How To Remove Hard Water Stains From A Plastic Fish Tank?
A: To eliminate the stains caused by hard water on a plastic fish tank:
- After emptying the tank, give it a good rinsing with some clean water.
- Make a solution by combining water and white vinegar at a ratio of 1 to 1.
- Apply the concoction to the soiled areas and then wait a few hours for it to take effect.
- Use a gentle scrubbing motion and a soft brush or sponge to remove the spots.
- To remove the smell of vinegar completely, give the tank a thorough rinsing with clean water.
- Before adding fish, check that the tank has been adequately conditioned and refilled with fresh water.
Q: How To Patch A Hole In A Plastic Water Tank?
A:To repair a hole in a plastic water tank, one would do the following:
- The tank has to be emptied, and the damaged area needs to be cleaned.
- To cover the hole, cut a piece of plastic from a repair kit or another material that is comparable in strength.
- Around the perimeter of the hole, apply plastic epoxy or an adhesive formulated specifically for plastic repairs.
- After firmly pressing the patch onto the adhesive, wait for it to cure as directed by the manufacturer of the adhesive.
- Fill the tank back up with water and check for any leaks after the fix has been tested.
Q: How To Repair Plastic Water Tank Leakage?
A: The following steps are required to repair a leak in a plastic water tank:
- Performing maintenance on the tank by emptying it out.
- Finding out where the water is leaking from.
- To stop the leak, you can either use an epoxy or a plastic repair kit.
- Keeping to the instructions and letting the patch dry out.
- We are now refilling the tank while keeping an eye out for any more leaks.
Q: How to seal a hole in a plastic water tank?
A: To seal a hole in a plastic water tank:
- It is necessary to empty and clean the tank.
- To improve the adhesiveness of the joint, sand the region surrounding the hole.
- Use plastic epoxy or an adhesive that is created specifically for repairing plastic.
- On top of the glue, you should press a patch or plug that is made of the same sort of plastic.
- Before you refill the tank, make sure it is totally dry first.
Q: How to fix a cracked plastic water tank?
A: Repairing a cracked plastic water tank can involve:
- Performing maintenance on the tank by emptying it out.
- To patch the break, apply plastic epoxy or a repair glue along its length.
- Attempting to press the fracture back together if at all feasible.
- allowing the glue to cure in accordance with the instructions.
- The tank is being refilled, and we are keeping an eye out for any leaks.
Q: How to stop leakage of a plastic water tank?
A: To stop leakage in a plastic water tank:
- First, the tank should be emptied, and then the area around the leak should be cleaned.
- Find out where the leak is coming from, and determine how big it is.
- Make any necessary repairs to your plastic object with epoxy, glue, or a repair kit created exclusively for plastic.
- Apply the patching material all the way over the hole and into the surrounding region.
- Wait until the repair has completely cured before you attempt to replenish the tank.
Q: Which Plastic Water Tank Is Best For Home?
A: The necessities for water storage, the amount of space that is available, and the available budget all play a role in determining which type of plastic water tank is appropriate for a residence. Because of their longevity and resilience to the damaging effects of ultraviolet light, tanks built from high-density polyethylene (HDPE) are a popular choice. Pick a container size that is appropriate for your requirements, and get products manufactured by trustworthy companies that come with guarantees.